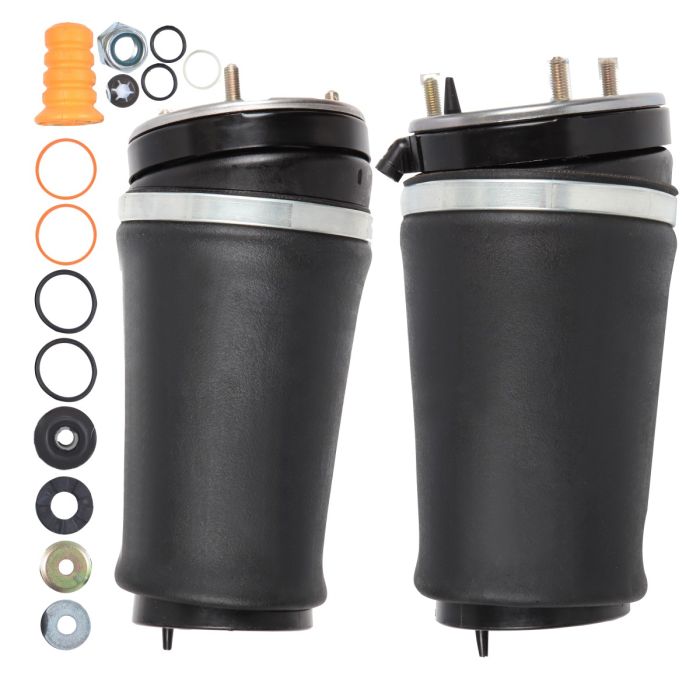
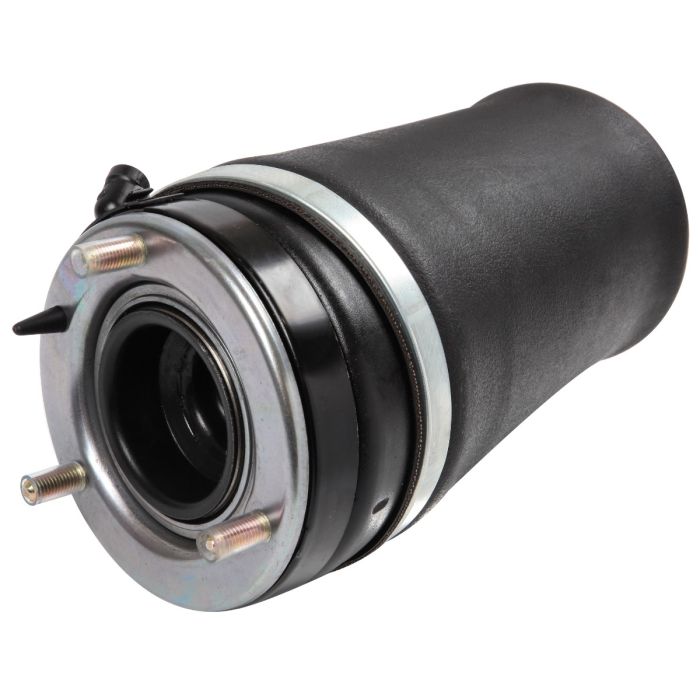
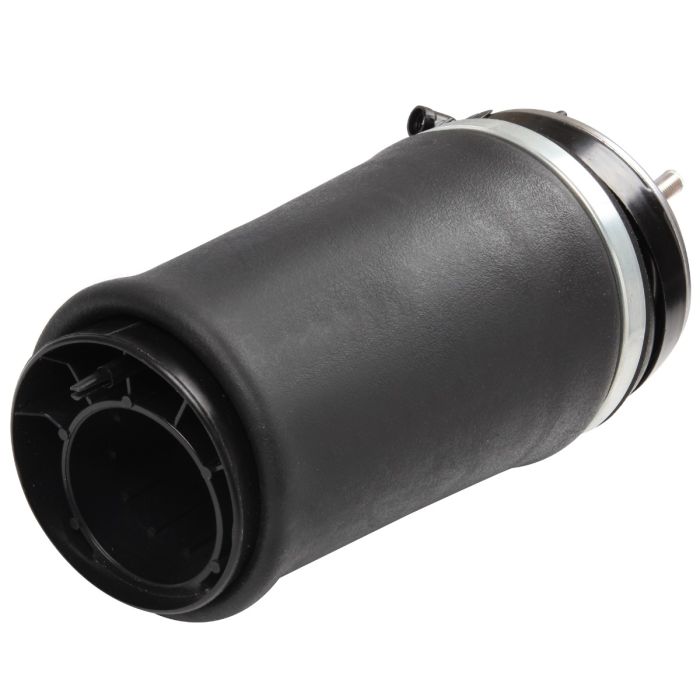
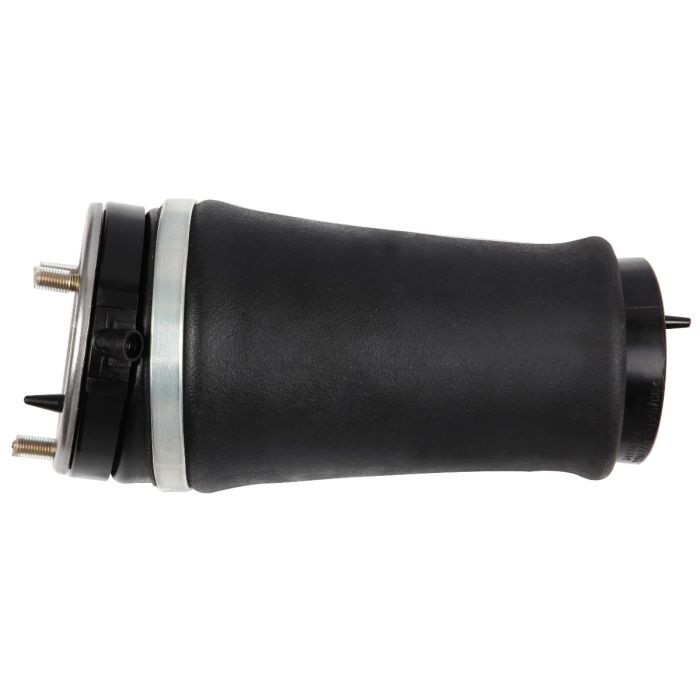

Front Pair Air Suspension Spring Bags For Land Rover Range Rover L322 2002-2012
- Fitments:2003-2012 Land Rover Range Rover, etc.
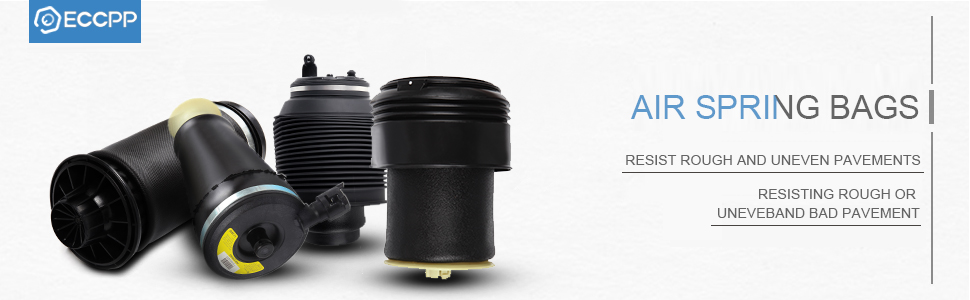
- Prevents sagging, an uneven suspension and the air compressor from running excessively
- Save money by replacing only a damaged or worn air strut instead of an entire kit
- Air bag/bellow components are designed for 388 psi standard operating pressure of KSport Airtech air suspension systems
Wholesale Deals: Enjoy 5%-20% Off! Tap to Unlock
| Buy 3 | Buy 10 | Buy 30 | Buy 50 | Buy 100 |
| $171.98 /ea | $170.13 /ea | $166.43 /ea | $162.73 /ea | $159.03 /ea |
2020 Buick Encore Essence 4Cyl 1.4L
Change VehicleThis product is universal
Retail Flash Sale: Buy More, Save More!
- Over $129, $5 OFF, Code: SAVE5
- Over $249, $15 OFF, Code: SAVE15
- Over $399, $30 OFF, Code: SAVE30
- Over $999, $80 OFF, Code: SAVE80
L322 Air Suspension
The Third generation L322 has a monocoque (unibody) construction with four-wheel independent air suspension. Air suspension allowed variable ride height and achieved similar axle articulation to the previous live axle design. This retained off-road abilities while improving on-road performance. The new Range Rover's introduction in late 2002 as a 2003 model for the North American market resulted in the Range Rover and Ford Expedition (also new for 2003) being the only two SUVs in the full-size sport utility class with four-wheel independent suspension systems at that time.
Item Specifications
Key Words: Front Pair Air Suspension Spring Bags For L322 2002-2012 Land Rover Range Rover
Product Specifics
- Part Type: Air Suspension Spring
- Fitment Type: Direct Replacement
- Size: Single Dimension(CM) 46.00(Length)*21.00(Width)*20.00(Height)
- Single Weight(KG): 5.580
- Upper Mounting Isolator Included: No Isolator Required
- Lower Mounting Isolator Included: No Isolator Required
- Upper Mount Type: Stud
- Lower Mount Type: Base Cup
- Included Hardware: Mounting Hardware
- Drive Layout: Front Engine 4WD
- Platform: L322
- Custom Bundle: Yes
- Material: Iron,Aluminium Alloy,Rubber
- Quantity: Pair
- Warranty: 1 Year
- OE Spec or Performance/Custom: OE Spec
- Adjustable: Yes
- Greasable or Sealed: Sealed
- Brand: ECCPP
- UPC: Does not apply
- Manufacturer Part Number: E805137CP01
- Interchange Part Number: Air Suspension Spring Bags, Air Ride Spring Bags
- Other Part Number: LR032570, LR051702, LR032563, LR051700
- Superseded Part Number: RNB000070, RNB000750, RNB000060, RNB000740
- *Platform Drive Layout: Front Engine-Four Wheel Drive Layout
- *OEM Part Number:
RNB000070,RNB000750,RNB500550,
RNB501350,RNB501410,RNB501530,
LR032570,LR051702,
RNB000060,RNB000740,RNB500540,
RNB501340,RNB501400,RNB501520,
LR032563,LR051700
*Important Information
1.Install black washer with lip facing up. Then, install nut and tighten.
2.Reinstall the lower cup and nut. Tighten the nut and re-install your existing top chuck.
3.Re-use and install your existing silver washer and align the threaded holes with the lower fork of the shock.
*Air Shock Strut Removal Guideline
1.Set steering to straight ahead.
2.Raise vehicle.
3.Remove front wheels.
4.To release the air pressure from the front struts you will need to remove the right side front wheel well liner.(picture 1)
5.With the wheel well liner removed you are able to access the front valve block located on the rear of the wheel well. Slowly release the air pressure from the front struts by loosening the yellow and black air hoses.(picture 2)
6.Next, remove the brake hose and abs sensor wire from the retention bracket on the strut.(picture 3)
7.Also remove the sensor wire from the front side of the strut held on with a small plastic clip.(picture 4)
8.Disconnect the sway bar link by removing the nut holding the ball joint to the strut. You may need to hold the ball joint from spinning by placing a wrench on the two flats of the ball joint.(picture 5)
9.Remove the two large bolts that hold the strut to the spindle assembly.(picture 6)
10.With the nuts and bolts removed from the spindle assembly, pull the spindle outward while pushing the strut inward to disengage them.(picture 7)
11.Under the hood are the upper retention fasteners, remove all three being careful not to drop the strut.(picture 8)
12.With the strut removed you can now gain access to its hose connection, remove the fitting to free the assembly.(picture 9)
13.Removal complete.(picture 10)
*Air Spring Removal Guideline
1.Remove the shock retention nut from the top of the air strut assembly.(picture 11)
2.Remove the nut and washer as illustrated.(picture 12)
3.With the upper retention hardware removed, flip the strut over and locate the alignment pin on the bottom of the air spring assembly.(picture 13)
4.With a slotted screwdriver or other adequate tool, remove the lock washer from the locating post.(picture 14)
5.Remove the lock washer as illustrated.(picture 15)
6.Tap the bottom of the air spring with a soft faced mallet to disengage the o-ring seals.(picture 16)
7.Air spring as well as all o-rings and o-ring spacers are discarded. The only thing you will reuse is the shock itself. Disassembled view of shock.(picture 17)
8.Clean the shock of any debris before beginning installation of the air spring.(picture 18)
9.Removal complete.
*Air Spring Installation Guideline
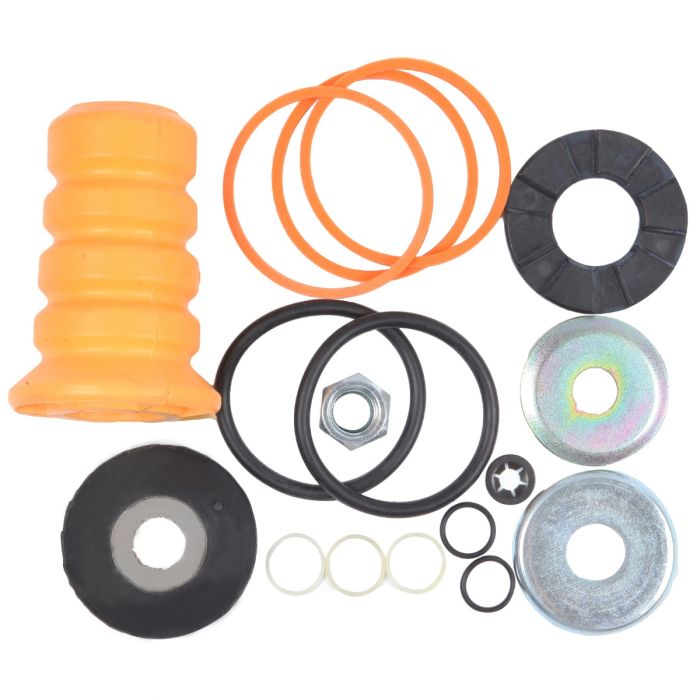
1.Install the new o-rings and o-ring spacers provided in 7 the kit in the same orientation as removed in step 7.
2.Install the provided bumpstop over the strut shaft in the depicted orientation.
3.Slide the gold washer over the threaded end of the shock.Ensure the perimeter “lip” Is facing downward away from the threads.
4.Slide the new air spring assembly over the shock. Make sure to align the plastic alignment pin on the air spring through the hole in the shock’s piston seat. After you have pushed the lower piston’s alignment pin through the shock’s spring plate, slide the external locking clip over the plastic pin to secure the air spring to the shock.
5.Push the upper black rubber mount over the shock’s shaft. Make sure to place the rubber seal in the correct orientation as depicted.
6.Slide the black washer over the treaded end of the shock.ensure the perimeter “lip” is facing upward and towards the nut.
7.Thread the m16nylon lock nut over the strut’s threaded shaft. You can tighten the nut using an impact wrench.
8.Install completed strut back into the vehicle in the reverse order of removal.
Depending on vehicle model, there are three possible build methods for your rebuilt arnott strut. Before proceeding with the build process,be sure to differentiate which air strut you are rebuilding and select the correct option.
*Air Shock Strut Installation Guideline
Installation is in reverse order of removal.
Note
Please double confirm the compatibility as well as the OEM number before purchasing.
Instruction is not included. Professional installation is recommended.
Frequently Asked Questions
How to prevent the damage of air springs/How to extend the service life of air springs/struts etc.?
An air strut with separable air springs
If your vehicle offers a separable air suspension (Audi Allroad A6 C5, Mercedes-Benz W164, BMW X5, etc.), you should regularly (about once a week) lift the car to the maximum position, and remove dirt with a high-pressure cleaner (keep the cleaner at a distance to the air spring about 30 cm/12 inches, otherwise water pressure can damage the air spring). The highest position may vary depending on your model and regulation options. Therefore, please test this by trying the different modes available to you (Sport, comfort, dynamic, off-road) and choose the one that sets your vehicle to the highest position. The dirt will most likely be found under the fold of the pneumatic chambers. If you find a frozen layer of bitumen on the piston guide (the part of a strut on which the air spring is installed), it is recommended to clean it as well. Whenever possible, avoid riding on fresh asphalt, as fresh bitumen mixed with sand immediately results in a build-up of abrasives on the piston and in turn contributes to accelerated wear and tear of the air spring.
A complete air suspension shock
Many cars such as Mercedes W220 or W211 are set up with a complete air strut - shock absorber and air spring visually form a complete spare part. In many cases, you can easily recognize these by the metal cups with which the air spring is tightly mounted. To best avoid any damage, we highly recommend to regularly check the condition of the dust protection seals of the air strut.
What is the difference between an air spring and an air strut?
The air spring is a part of the air strut. Some vehicles (e.g. Mercedes ML) allow you to change the air spring separately. At our online shop you have the opportunity to buy either the whole air strut or only the air spring. For some type of vehicles it is not possible to change the air spring separately. In this case the whole air strut should be replaced.
Which side of my car is the Right and Left?
The right and left sides of an automobile are determined as if sitting in the car facing forward. Thus, the left side is on the left when sitting in the car facing forward, and the right side is on the right. For American cars, the driver’s side is on the left, and the passenger sits to the right of the driver. For cars in Japan, Britain, Ireland, the Bahamas and some other former British colonies -- where they drive on the left side of the road -- the passenger sits on the left side, and the driver (along with all the driving controls) is on the right.
Includes
Pair for Front Left & Right Air Suspension Spring Bags
Part Fits For
| VEHICLE NAME | YEAR | ENGINE |
|---|---|---|
| Land Rover Range Rover | 2003~2012 | 4.2L|4.4L|5.0L |
Frequently Asked Questions and Answers
Shipping Policy
Please confirm the shipping address and billing address. The shipping address should be a physical address, we DO NOT ship to the P.O. box address.
Handling Time
Once the order was placed please allow us 1-2 business days for packing and shipping, checking the order information is a very important step to build a better shopping experience.
Special Case: For the transaction paid by using a PayPal eCheck, the payment will be completed within 3-6 business days. The handing and shipping should be started up as soon as the payment is successful.
Shipping Time
The order will be shipped on the same day or the next business day, especially for the order on Friday or weekend, it would be shipped on the next business day.
ECCPP website orders were being supported by USPS, UPS, and FedEx.
International Shipping/ Postage
We could only offer an International shipping service for Canada. After checking your location, we will send the actual shipping fee to your email for confirmation.
Split Shipments
If your order contains multiple parts, you may receive more than 1 package for the following reasons: (1)The parts ordered are currently in different warehouses. (2) The parts won’t all fit in a single package. It may cause different delivery times. Please wait patiently and don't worry, thank you.
More details please check out shipping policy.
Warranty Policy
We offer a 1-year warranty for our products, if you get any warranty-related trouble with our products, you could contact ECCPP directly for professional and quick support, we'll help you solve the issue 100% sure! We also take care of all quality-related issues with a replacement including any return shipping costs. For the products purchased from one of our retailers, we do not provide support related to after-sales. Please contact the retailer directly for specific guidance on their warranty process.
Exchange & Return Policy
When you purchase products from ECCPP official site, you agree to our policy about returns, exchanges, and refunds as outlined. More details please check out exchange and return policy.